Professional invoicing is a very crucial role that helps ensure timely payment collections and keeps the healthy cash flow for your business. With Xero, the whole process of invoicing can be streamlined while keeping it professional and effective. This guide is a step-by-step guide on the essentials of creating invoices in Xero.
Content Outline
Key Summary
Importance of Professional Invoicing
A clear, concise invoice ensures timely payments, improves cash flow, and reflects professionalism in your business transactions.
Essential Components of an Invoice
Includes seller and buyer details, product/service information, payment instructions, and optional branding like a company logo.
Step-by-Step Guide to Creating Invoices in Xero
Detailed instructions on adding business and customer details, describing items, setting payment terms, and using Xero’s templates.
Tips for Effective Invoicing
Keep invoices concise, use consistent language, and send invoices promptly to avoid delays and ensure smooth payment cycles.
FastLane’s Invoicing Support with Xero
FastLane provides customized tools, automation features, and expert assistance to streamline invoicing processes for businesses.
The Goal Of Professional Invoicing
The main goal of professional invoicing is to have your invoices taken seriously by your customers. Invoices that are clear and concise are more likely to be paid promptly than those that are unclear. By making the invoice easy for your customers, you can eliminate unnecessary delays and speed up your payment cycle.
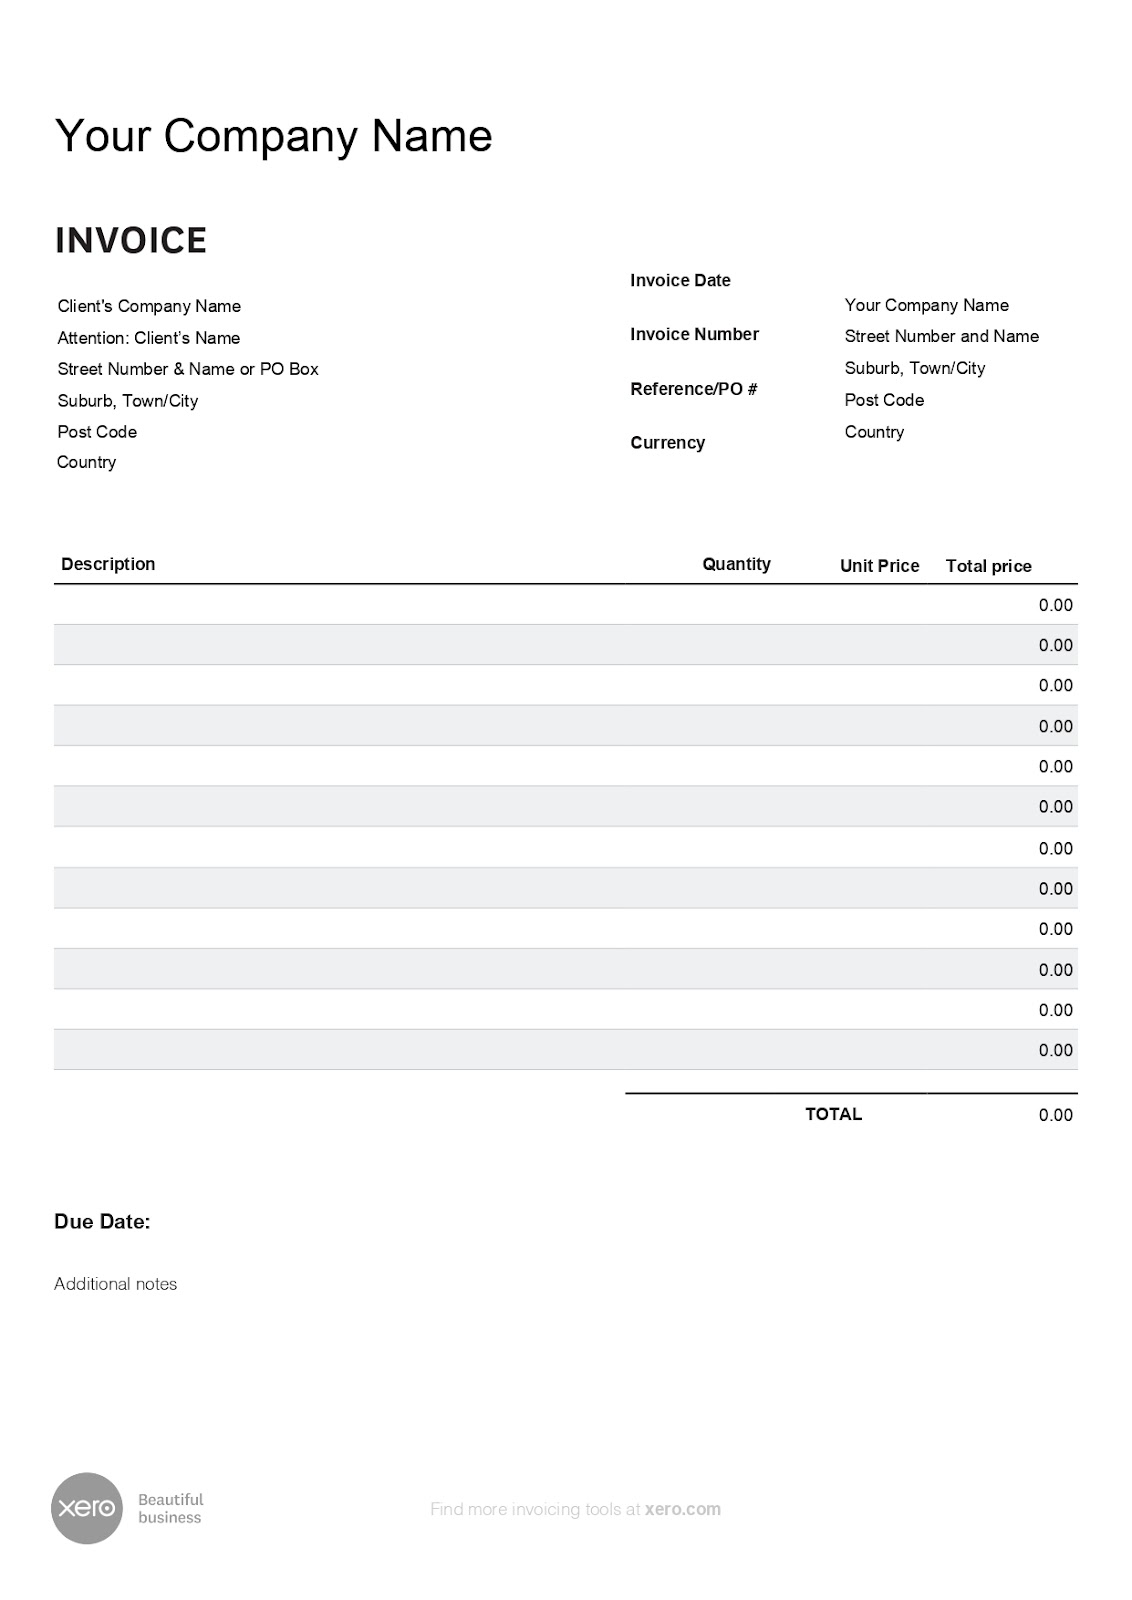
What Makes A Proper Invoice?
An effective invoice comprises all the necessary details to inform the customer about the transaction and the method of payment. Here’s what a proper invoice should include:
- Seller Details: Your business name, contact details, address, and logo to establish authenticity and professionalism.
- Buyer Details: Accurate information about the customer that includes their name, address, and if applicable, their accounts payable contact.
- Product or Service Information: A detailed description of the products sold or services rendered including quantities and prices.
- Payment Details: Clear instructions on how to pay and when to pay including your bank account details or preferred payment methods.
Invoice Templates and Tools
To make invoicing easier, consider using templates or an invoicing tool. Xero offers in-built invoice templates, which are easy to customize, and include pre-configured formulas to automatically calculate the total, taxes, and discounts. Digital invoicing saves time but also minimizes human errors.
Making An Invoice Step by Step
Here is a step-by-step guide to creating an invoice in Xero:
1. Seller Details
Start with your business details:
- Business name
- Contact number
- Company address
- Invoice date
- Invoice number (a unique identifier for record-keeping)
- Logo (optional, but recommended for professionalism)
2. Buyer Details
Include the customer’s information:
- Name and address
- Accounts payable contact if dealing with a business
This ensures the invoice reaches the right person and avoids delays.
3. Product/Service Information
Provide a clear description of what was sold or the services offered:
- Item names
- Quantity
- Price per unit
- Applicable taxes (VAT, GST, etc.)
4. Payment Details
Clearly state how and when the payment is due:
- Bank account details or other options for payment
- Due date of payment
- Additional payment terms such as discounts for early payment
Importing an Invoice
Xero allows users to import an invoice from an external template which is useful for businesses that are already using some pre-designed format. At the same time, ensure the imported invoices are aligned with your existing records to keep consistency in place.
How To Create And Send An Invoice In Xero
1. Create a new invoice
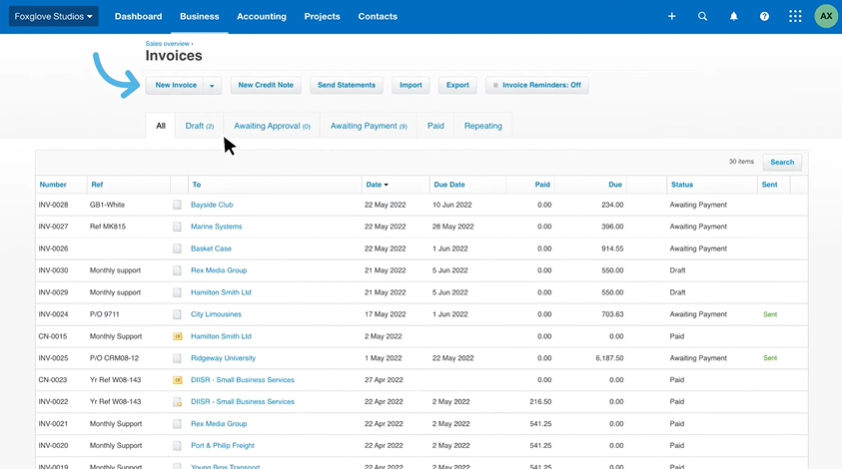
- Go to the “Business” Menu and select Invoices or click the + icon and choose “Invoice”.
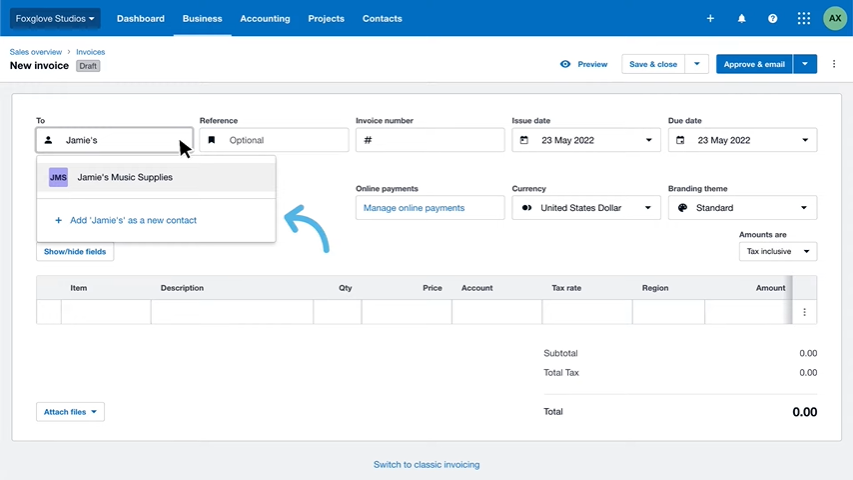
- Enter the business name.
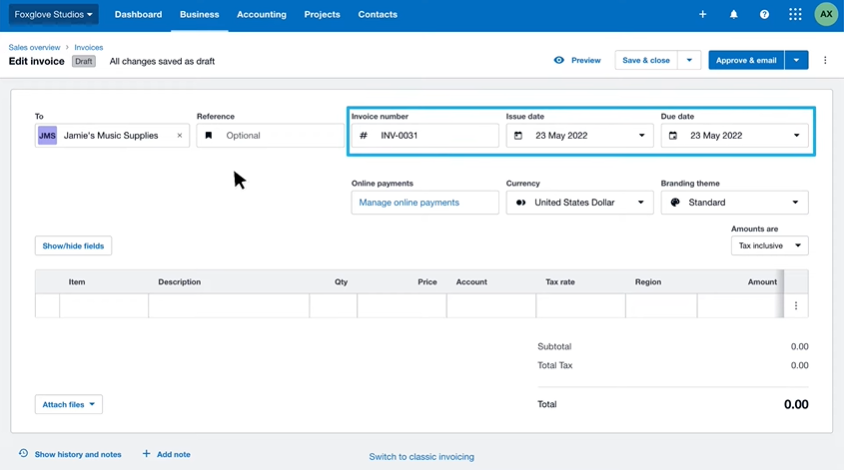
- Xero will automatically assign an “invoice number” and dates:
- Review the default “due date” and modify if needed.
- Enter the details of the invoice such as Description, Quantity and Price
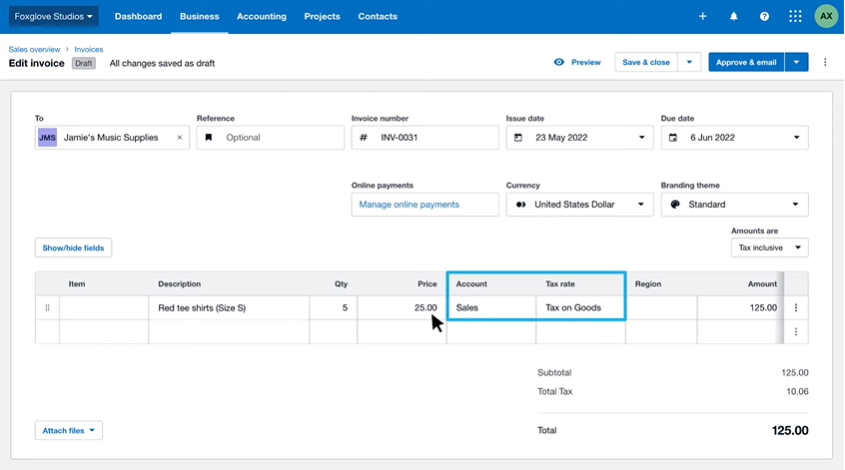
- Verify the “Account” and “Tax Rates” are correct
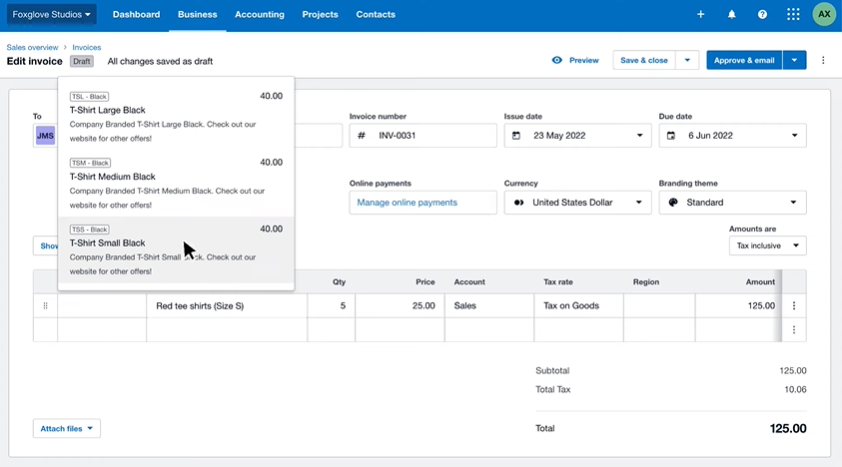
- If you’ve set up “Products and services” in Xero, you can choose them in the “Item” menu and Xero will fill the fields for you.
2. Send the Invoice to your customer
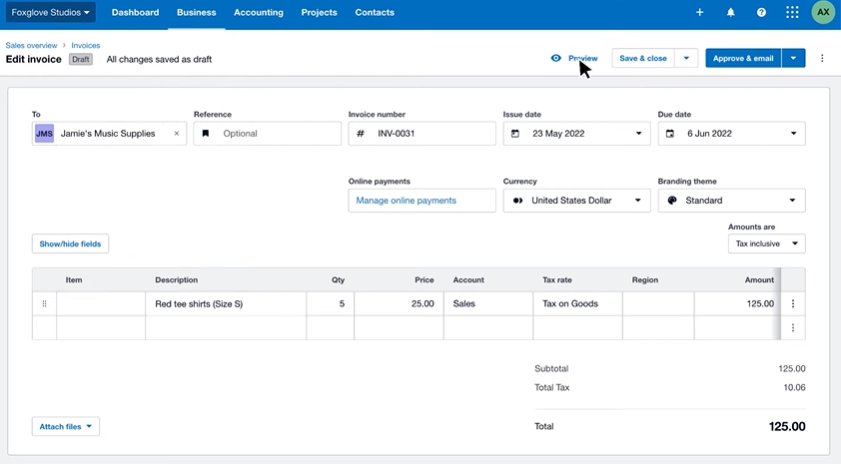
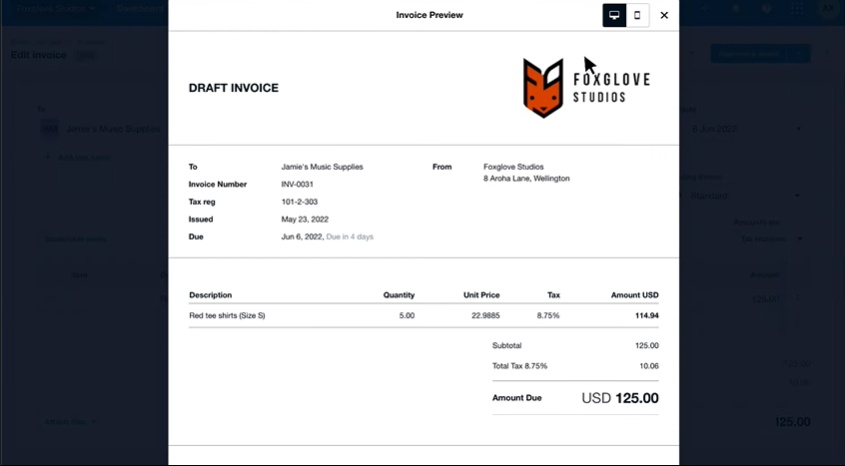
- Make sure you check the invoice by clicking “Preview” to see how it appears.
- Once you’re happy with the invoice, click “Approve and email”
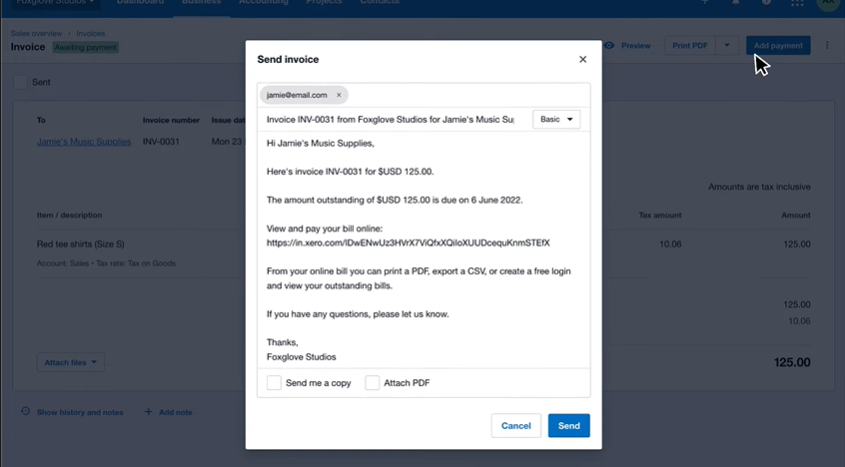
- Confirm “customer’s name” and “email address” before sending.
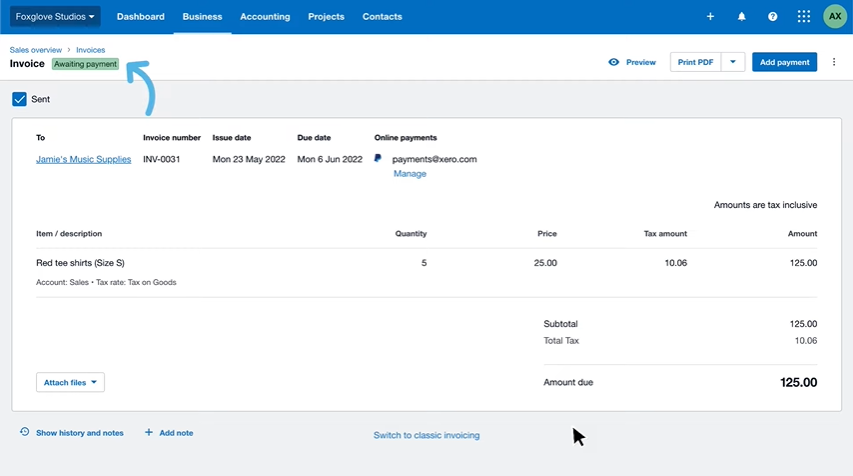
- Click “Send”so Xero sends the invoice and marks it as “awaiting payment”.
3. Customize your invoice template
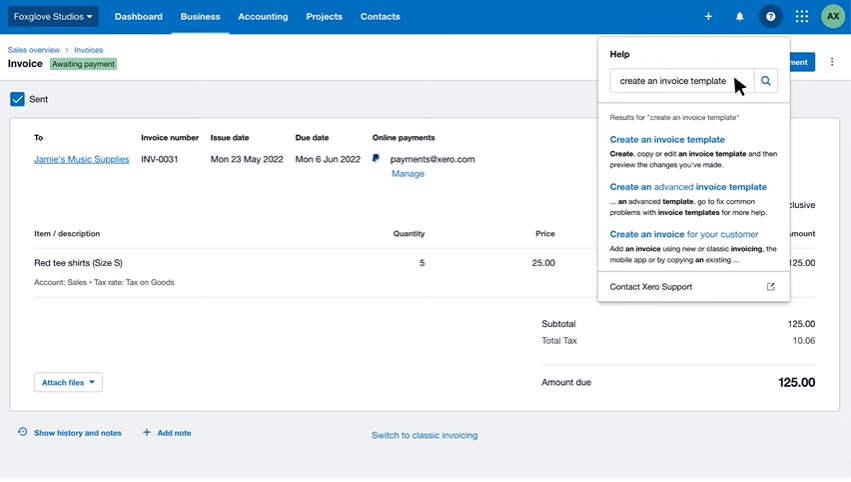
- When you’re ready to customize invoices to your specific needs.
- Search “create an invoice template” in the help menu to find out how.
Learn how to create and send an invoice in Xero
Serious Invoicing Tips
Make your invoices effective and professional by considering the following tips:
- Keep It to One Page
While you can provide detailed lists separately, the main invoice itself should remain concise.
- Use Consistent Language
Make sure the language is the same as in any previous quotes or agreements.
- Be Timely
Do not delay invoicing. Set aside specific time to create and send invoices on a regular schedule.
How Can FastLane Help?
FastLane provides businesses with a set of tools and resources to make the invoicing process easier with Xero which provides customizable templates, automation features, and reporting tools that will make your invoicing a breeze. For more invoicing assistance, contact FastLane and find out more!
