SMEs need cloud accounting solutions that are easy to manage yet powerful enough to support their daily operations. While many platforms offer similar features, Xero’s intuitive interface and automation tools make it a top choice for growing businesses. In this guide, we’ll walk you through the essential steps to set up Xero properly and show how FastLane’s expert support can help streamline the process, ensuring you get the most out of your cloud accounting solution from day one.
Table of Contents
Key Summary
Complete Your Xero Organisation & Financial Settings First
Setting up your company profile, financial year-end, base currency, and conversion balances lays the foundation for accurate accounting and compliance.
Configure Tax Rates and Chart of Accounts Correctly
Customise tax rates (e.g., VAT/GST) and import a tailored chart of accounts to ensure accurate tax reporting and financial tracking from day one.
Automate Banking, Expenses, and Receipts Integration
Connect bank feeds, apply bank rules, and use tools like Hubdoc to streamline data entry and categorisation, saving time and reducing manual errors.
Invite Users and Set Permissions Wisely
Add team members and accountants with role-specific access and two-factor authentication to enhance collaboration and data security.
Customize Invoices, Reports, and Integrate Add-Ons
Design branded invoices, enable online payments, and explore Xero-connected apps to extend the platform’s functionality for your unique business needs.
1. Set Up Your Xero Organization Profile
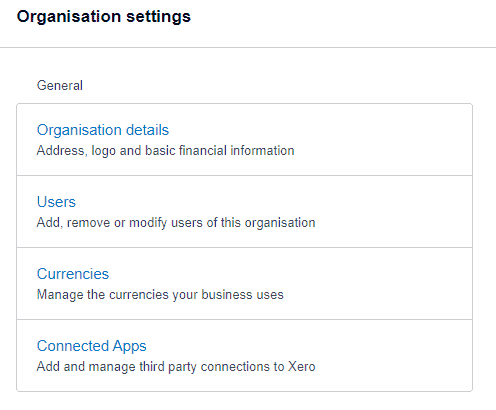
To begin your Xero setup organization, go to Company > Settings > Organization Details. Here, input all key business details in Xero such as your legal name, trading name, business registration number, tax ID, contact information, and upload your company logo.
These details automatically appear on your invoices, quotes, and reports so getting them right from the start ensures your documents look professional and consistent. A complete and accurate organization profile helps build trust with clients and avoids manual edits later.
2. Configure Financial Settings in Xero
Next, configure your Xero financial year settings by setting your financial year-end under Company > Settings > Financial Settings. This ensures your reports align with statutory deadlines and reflect accurate financial data. Then, choose the correct base currency in Xero. This is a critical step especially for global businesses as it cannot be changed later. If you operate in multiple currencies, consider upgrading to Xero’s Premium plan, which supports over 160 currencies with real-time exchange rates.
If you are switching from another accounting platform, input your conversion balances to carry over opening balances accurately. This ensures your financial history stays intact within Xero.
3. Add and Customize Tax (VAT/GST) Rates
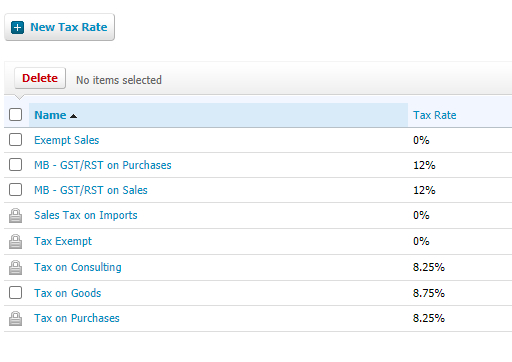
Proper Xero VAT setup is essential for businesses registered for VAT or GST. Navigate to Accounting > Advanced > Tax Rates to add or edit tax settings relevant to your jurisdiction.
Set up local VAT rates and understand the differences between zero-rated, exempt, and standard VAT to ensure correct tax treatment in transactions. For instance, zero-rated means you charge 0% VAT but still report it, while exempt means VAT does not apply at all. If you are unsure which rates to apply, speak with your accountant or a Xero Certified Advisor to avoid compliance issues and simplify VAT reporting.
4. Connect Your Bank Accounts and Set Bank Rules
Go to Accounting > Bank Accounts to start your Xero bank feed setup. Connect your business bank accounts (e.g., AIB, Revolut) and payment platforms like PayPal and Stripe for live daily feeds. If your bank isn’t supported, you can manually upload bank statements using CSV files.
Once connected, set up Xero bank rules to automate how transactions are categorised. For example, any payment labeled “Ryanair” can automatically be sorted under the “Travel” category with the correct VAT rate.
5. Set Up Chart of Accounts (or Import Existing One)
Setting up your Xero chart of accounts is critical for accurate bookkeeping and financial reporting. Xero provides a default chart, but you can customize it or import a chart of accounts in Xero from your previous accounting software (e.g., QuickBooks or Sage).
To do this, go to Accounting > Advanced > Chart of Accounts. You can manually create new accounts or upload a CSV file for a bulk import. Work with your bookkeeper or accountant to ensure your chart of accounts matches your business structure and compliance needs.
6. Add Users, Roles & Accountant Access
If you want to add users, go to Settings > Users to invite staff and your external accountant. You can customize access levels such as read-only, invoice-only, or full access, depending on the role of each team member.
Enable two-factor authentication and regularly review user permissions to protect sensitive financial data.
7. Set Up Hubdoc to Capture Receipts and Bills
Hubdoc is a powerful tool that helps you automate receipt capture in Xero. It extracts key data from bills, invoices, and receipts and sends it directly to your Xero account saving you hours of manual data entry.
To begin your Xero Hubdoc setup, go to Company > Hubdoc and connect your account. You can upload documents via mobile app, email, or drag-and-drop on desktop.
Read Xero and Hubdoc integration
8. Add Customers, Suppliers & Product Items
Manage your contacts efficiently by going to Contacts > Customers and Contacts > Suppliers. When you set up customers in Xero, input as much detail as possible such as their email, phone, credit terms to help with tracking payments and CRM.
Use Smart Lists to segment your contacts, such as overdue clients or high-value customers. To manage products and services in Xero, go to Business > Products and Services. Assign item codes, track inventory, and apply service rates especially useful for issuing consistent invoices.
9. Create Branded Invoice Templates & Payment Options
Customize professional-looking Xero branded invoices by going to Settings > Invoice Settings. Create invoice templates aligned with your branding, including your logo, font, and layout.
Next, complete your Xero payment services setup by integrating Stripe, PayPal, or GoCardless. This allows customers to pay you online directly from the invoice to speed up your cash flow. You can also enable automated payment reminders for invoices that are 7, 14, or 21 days overdue.
10. Enable Payroll & Staff Expense Management
To set up payroll in Xero, go to Payroll > Payroll Overview. Xero Payroll supports salary calculations, tax filings, and leave management.
For businesses outside supported regions, consider integrating third-party payroll apps. Xero also includes Xero Expenses that allow you to manage staff reimbursements, track expense claims, and approve submissions, all in one platform. Always check local compliance requirements or consult an accountant when configuring payroll features.
11. Customize Reports and Dashboard Widgets
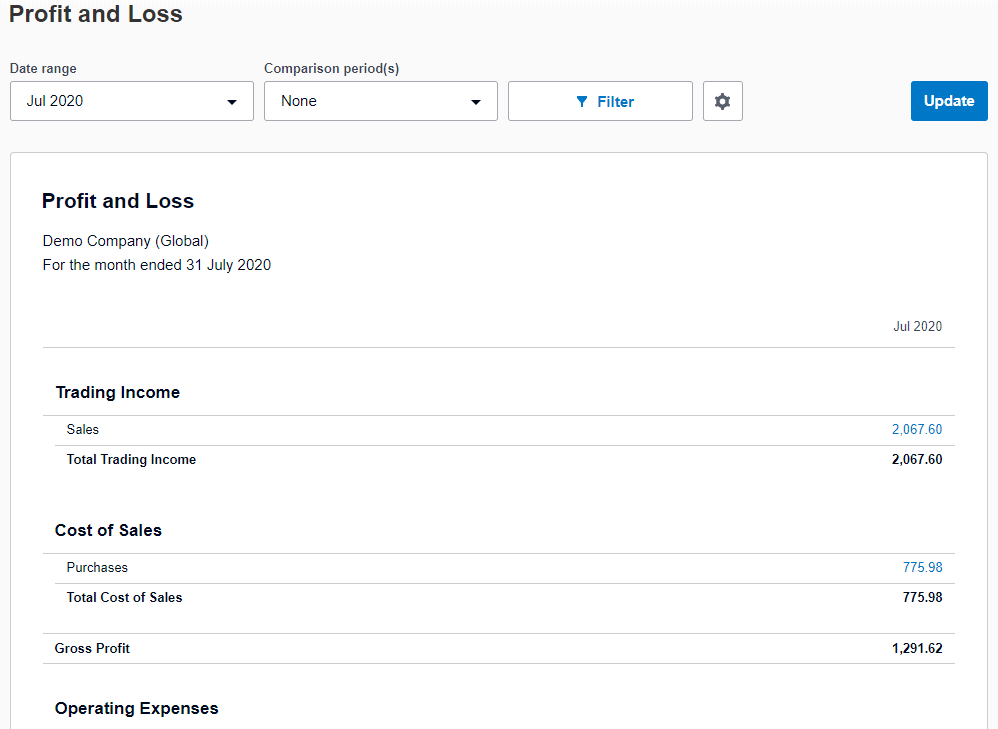
Gain better visibility into your finances by customising your Xero dashboard via Dashboard > Edit Dashboard. Choose what widgets appear like cash in/out, overdue invoices, and expense claims to match your business priorities.
Under Accounting > Reports, you can customize the Profit & Loss, Balance Sheet, and Cash Flow statements. Save report templates for monthly reviews or investor reporting.
12. Enter Opening Balances and Conversion Date
Setting the correct Xero opening balances is essential when migrating from another system. Go to Accounting > Advanced > Conversion Balances to input your starting figures.
You’ll need:
- Conversion date
- Trial balance figures
- Outstanding invoices and bills
13. Connect Additional Apps and Extensions

Enhance your accounting with powerful Xero connected apps. Go to Settings > Connected Apps to explore integrations. Popular apps include:
- Float (cash flow forecasting)
- Dext (automated data entry)
- Shopify (eCommerce integration)
- Square (POS system)
These Xero app integrations help automate and extend functionality for CRM, payroll, time tracking, and inventory management that makes Xero a true business hub.
Common Xero Setup Mistakes to Avoid
Even with a user-friendly platform like Xero, setup mistakes can lead to compliance issues and reporting errors. Here are the most common mistakes:
1. Forgetting to Configure Tax Rates
Neglecting to set up GST or VAT rates properly can lead to incorrect invoicing and tax filings. Go to Accounting > Advanced > Tax Rates and ensure all relevant rates are applied to your chart of accounts and products.
2. Entering Incorrect Opening Balances
Miscalculating your Xero opening balances will throw off your financial reports. Always double-check data from your previous accounting software or consult your accountant before inputting balances under Accounting > Advanced > Conversion Balances.
3. Not Connecting Your Accountant
Your accountant can provide real-time advice, but only if they have access. Go to Settings > Users and assign your accountant the right permissions to support compliance and reporting.
4. Ignoring User Permissions
Not everyone needs full access. Set appropriate user roles to protect sensitive information and maintain data integrity. Review permissions regularly to align with team changes.
When Is the Best Time to Set Up Xero?
Should you set up Xero at the end of the financial year or mid-year? Both are possible, but here’s what to consider:
End of Financial Year Setup
This is the most common choice. It ensures a clean break from your old system and simplifies annual reporting. All your transactions start fresh in Xero.
Mid-Year Setup
If your current software isn’t serving your needs, you can switch mid-year. However, you’ll need to enter conversion balances, including unpaid bills and invoices, as of the transition date.
Why Early Planning Matters
Starting a month before your target switch date allows time to:
- Import data
- Test reports and integrations
- Train staff
- Fix errors before they impact operations
Pre-Switch Checklist
Before switching to Xero:
- Export financial data from your old software
- Choose a conversion date
- Gather unpaid invoices and bills
- Confirm tax rates
- Invite your accountant and team
- Back up your legacy system
Conclusion
Setting up Xero properly is essential for accurate reporting, tax compliance, and streamlined business operations. From configuring your chart of accounts to automating receipts with Hubdoc, every step sets the foundation for future growth.
FastLane’s Xero-certified experts can help with Xero setup, conversion, training, and support tailored to your business needs. Contact us now for a free consultation and get started with Xero the right way.
FAQs About Setting Up Xero
1. How long does it take to set up Xero?
Most basic setups take 1–3 hours, but complete conversions with historical data can take several days depending on complexity.
2. Can I migrate from QuickBooks or Sage?
Yes, you can migrate from QuickBooks, Sage, and other platforms. You can use Xero’s import tools or get help from a Xero partner like FastLane for a smooth transition.
3. Do I need an accountant to set up Xero?
While it’s possible to do it yourself, having an accountant ensures accuracy—especially with opening balances, tax setup, and reports.
4. Can I use Xero without VAT?
Yes. Xero works for both VAT-registered and non-VAT businesses. You can skip VAT setup if it doesn’t apply to you.
5. What is the cost of Xero setup assistance?
Prices vary based on your needs. At FastLane, we offer affordable Xero setup and training packages tailored to SMEs and startups. Request a quote today.